3. JCloze Function
This function allows us to create exercises in which students need to fill a "gap" with an answer. Students may be asked to fill in one word, a phrase or numbers.
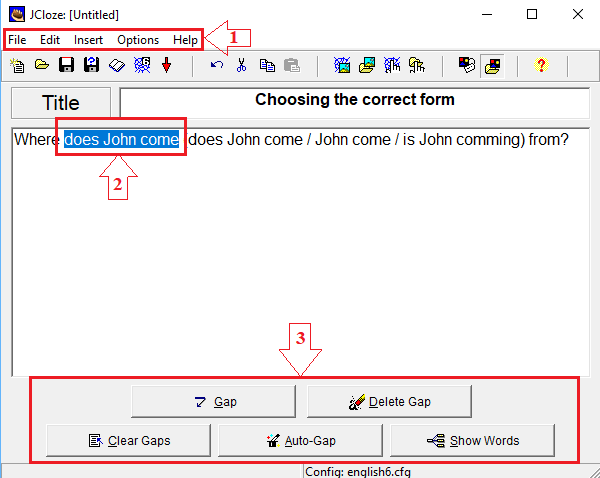
The "Title" field contains the required title of the exercise and the content of the exercises is put into the empty field below. The description of the picture:
- This area contains several options. Three buttons are important for our purposes. The "Insert" button allows us to insert an image either from our computer or from a web page. The "Options" button contains the output configuration function. The "File" button contains "Create Web Page" function.
- The word/words which are required to fill in are marked here.
- After selecting the required word/words we press "Gap" button.
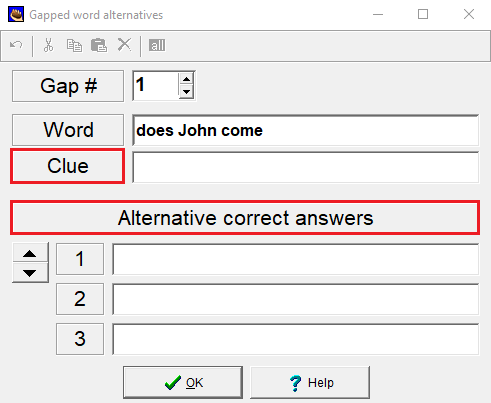
After pressing the "Gap" button, the dialogue box opens and allows us to add a clue that can help students to answer. Alternative correct answers need to be fulfilled when there are more possible answers.
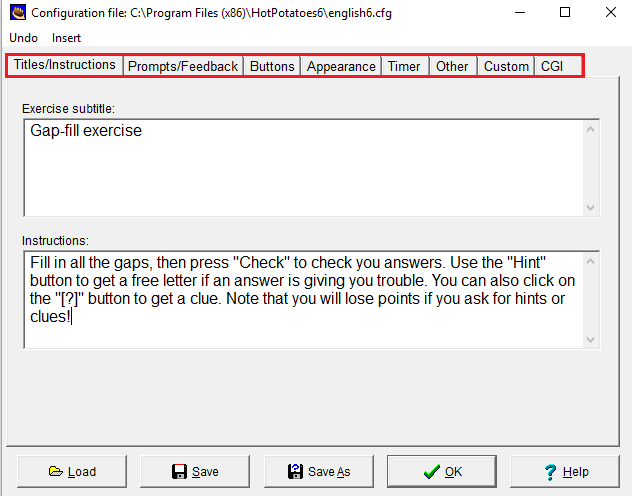
The "Configure output" in the "Options" button allows us to adjust individual components of the exercise:
- Titles/Instructions - this panel contains the name of the exercise and its instructions. We place the name in the "Exercise subtitle" field and we put the description of the exercise in the "Instructions" field so the students know exactly what is exprected of them. We also include a description of the buttons which they can use (check, hint, etc.).
- Prompts/Feedback - we can change the output texts that the student receive when completing the exercise in this tab. For example, we can change the output "Correct!" into any other phrase like "Great!" etc.
- Buttons - we can edit the button titles or we can choose whether we want to give the students buttons like "Hint" or "Clue" in this tab.
- Appearance - this tab contains the overall design of our exercise. We can select background graphics, ajust font type, font size, and use different colours of navigation bar, page background, title, etc.
- Timer - we can set a time limit for an exercise in this tab.
- Other - contains some additional options.
- Custom - we can enter our name which will appear above the exercise in this tab.
After adjusting the different settings, we can press "OK" button. The settings will be saved and it will return us to the exercise creation tab. When we are satisfied with the settings we can move to "File" button and select "Create Web Page" from the menu. The program asks us to save the exercise and then we can look at the exercise using a web browser.